
When I first uploaded my website to my host, it was hard. I didn’t know what FTP was or how to use my host. I use Arvixe (affiliate link).
In fact, I used to HATE my host. I only chose them because they were cheap and my sister referred me. I hated Arvixe because it was hard to navigate, especially for a beginner like me and they didn’t answer my questions quickly enough.
This past year, Arvixe has updated their services. Now, I LOVE Arvixe because they answer inquiries quickly and they have a help guide at the corner of the screen. The guide pops up every time you log in and it will walk you step by step on how to do something, so if you are a beginner with hosting, I highly recommend it.
In Dreamweaver, Go to Site in the menu bar
1. Go to site.
2. Click on Manage site.
3. Double click on the website you want to upload.
4. Click on servers.
5. Click the + sign, which is add new server.
6. Don’t have a panic attack.
Open your browser and log into your host site
I don’t know how other host sites are, but I think all of them have the same sections. If not, try to follow along and look for the same names.
1. Go to your cPanel.
2. Go to FTP accounts.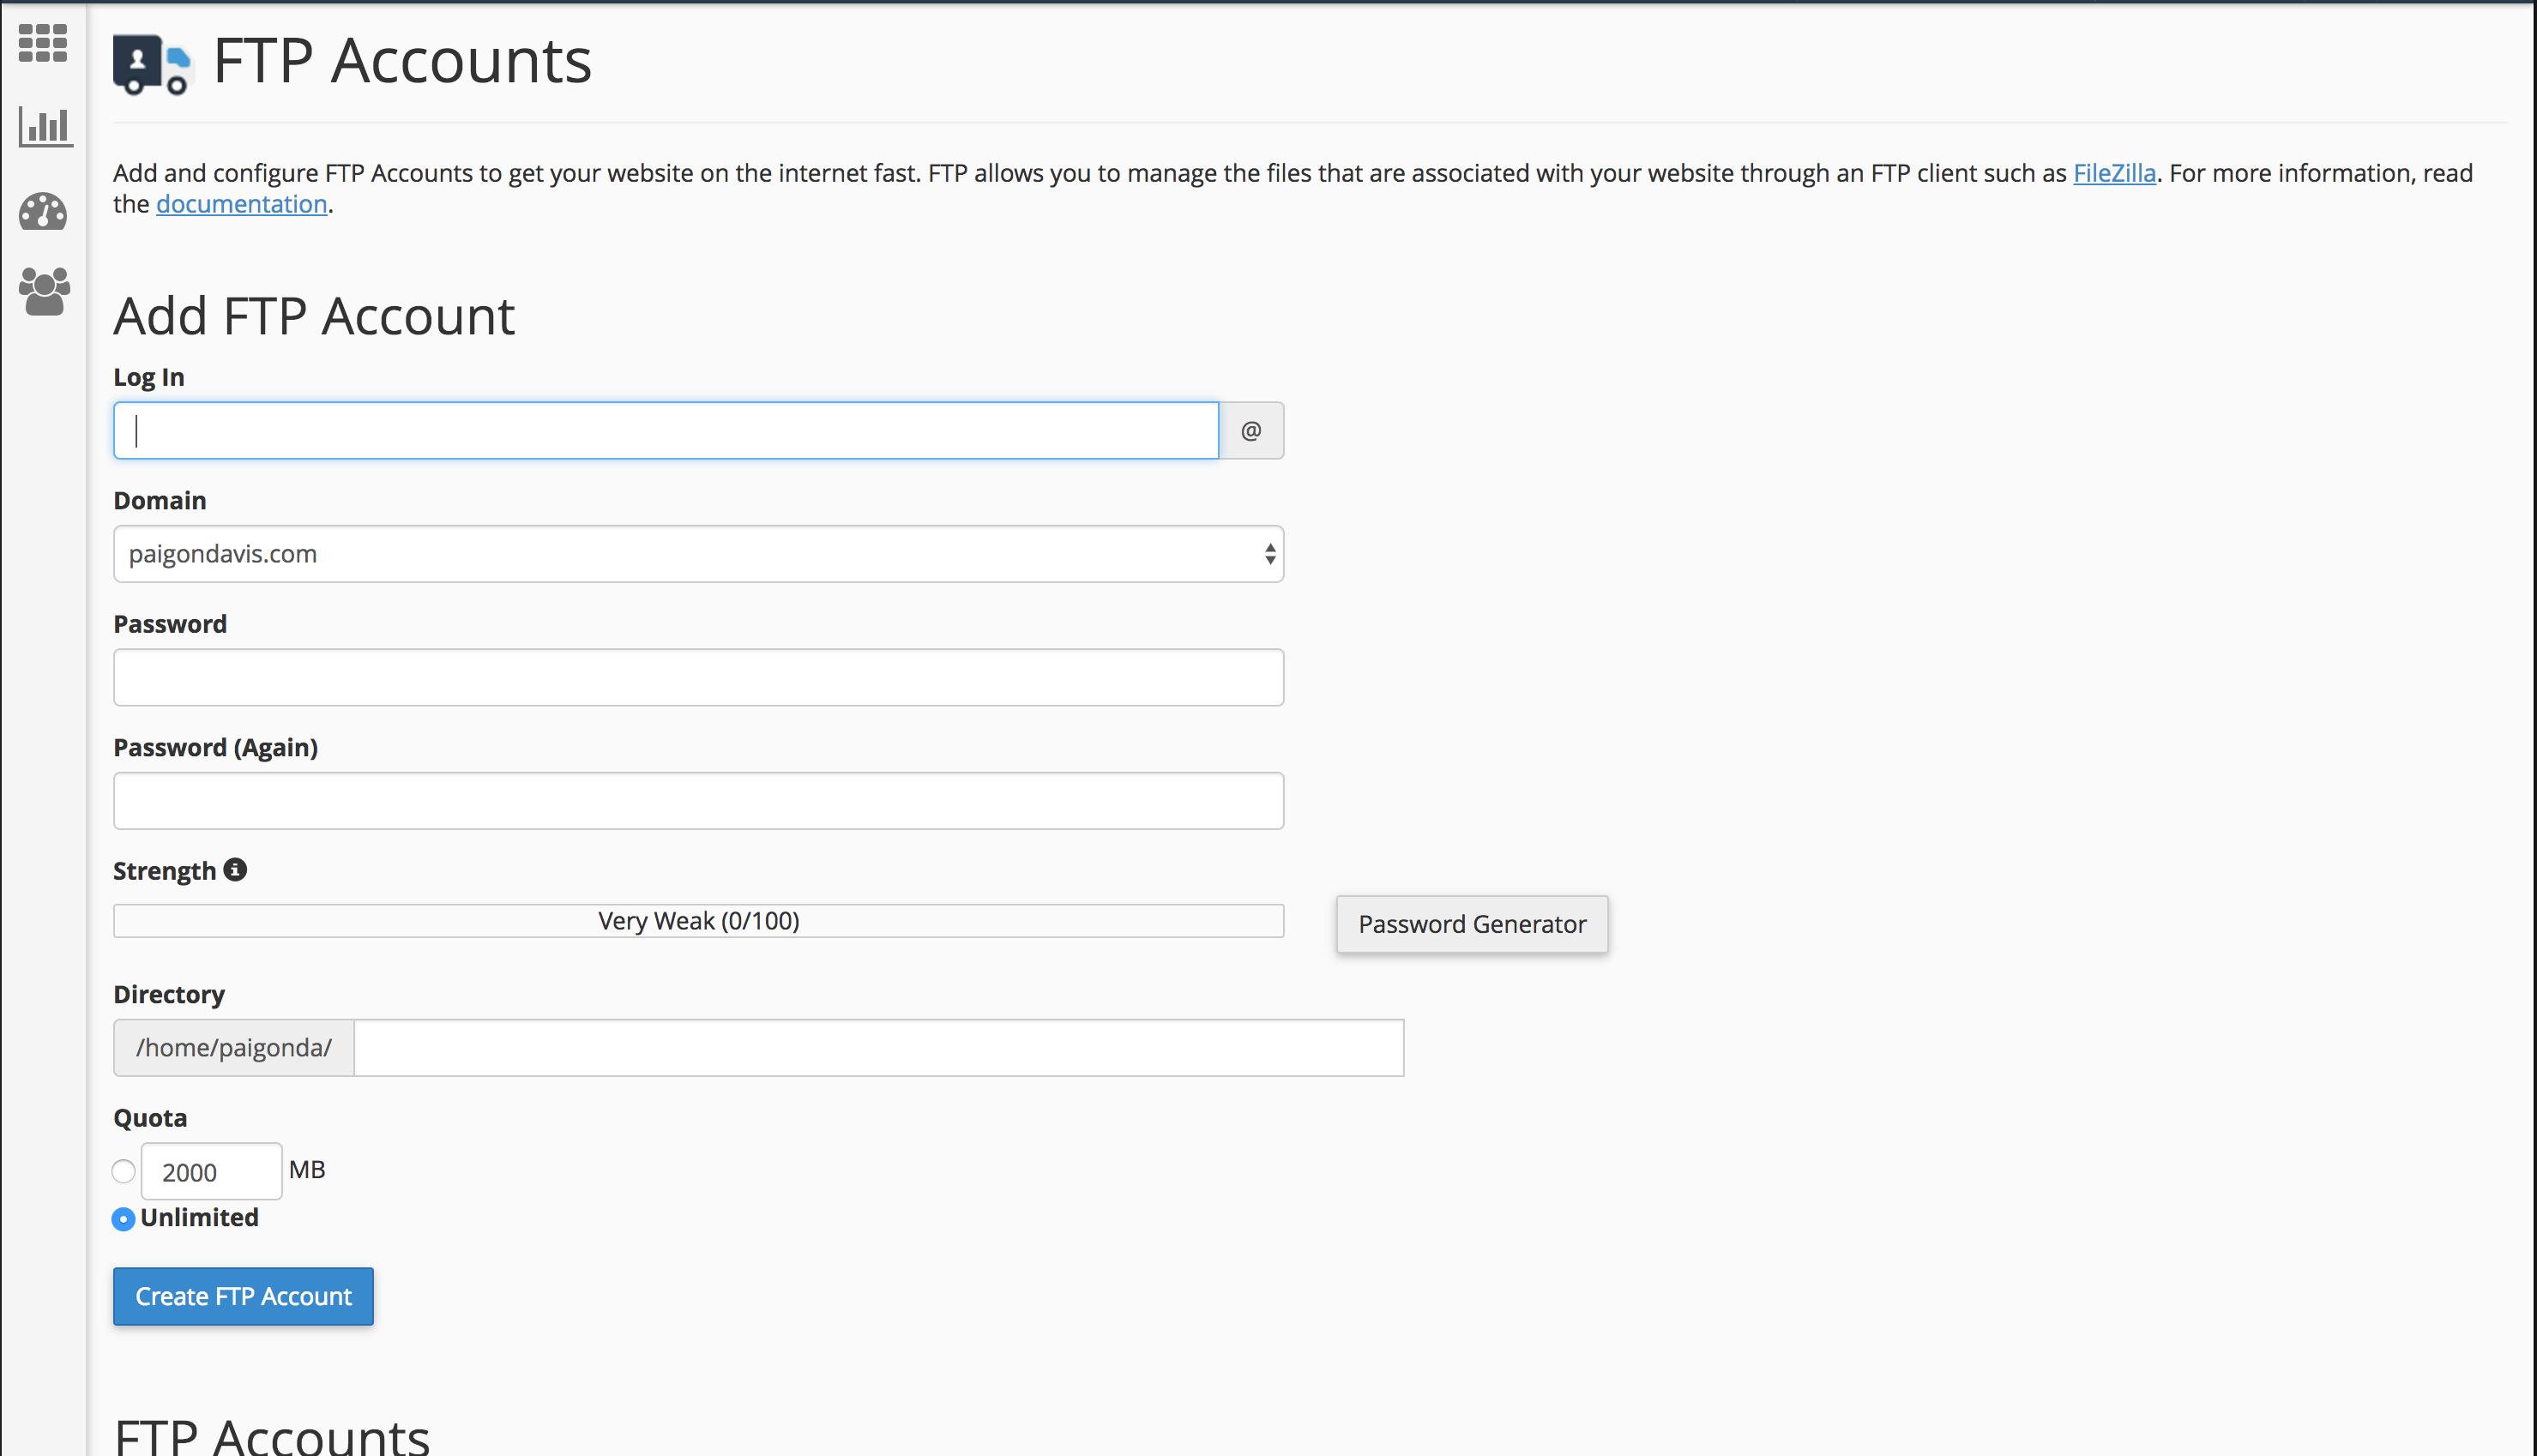
3. Choose set up for your website.
4. Look under ‘Configure FTP Client’
5. Now you should see:
FTP Username:
FTP server:
FTP & explicit FTPS port:
6. Make sure you create a password, and jot it down.
This is the information that you need for Dreamweaver.
Fill out the FTP information in Dreamweaver
1. Fill out the server name: ftp.whatever.com.
2. Fill out the FTP address: whatever.com.
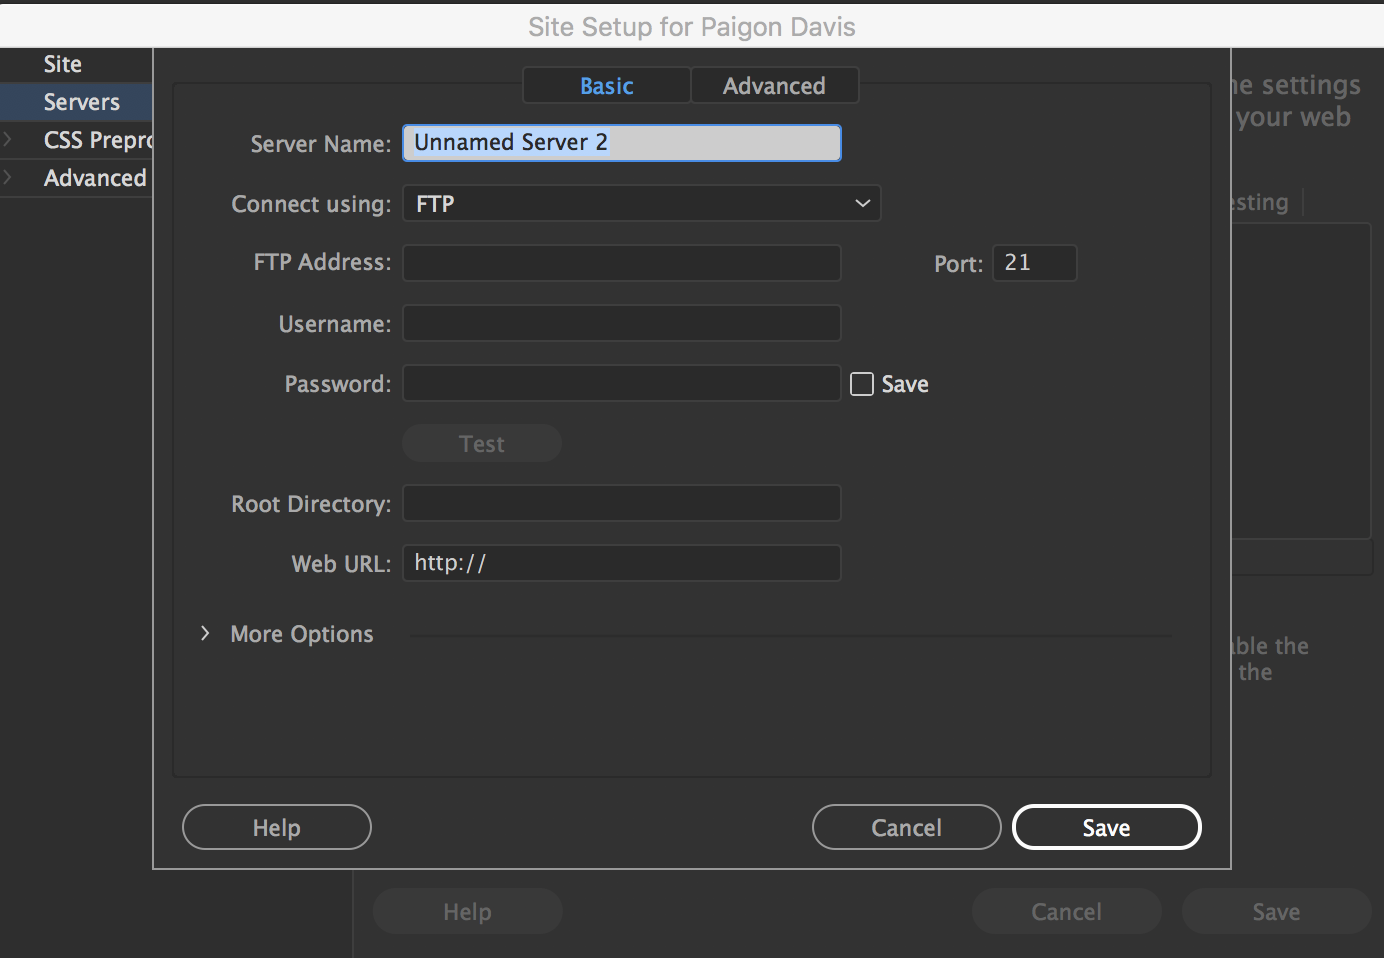
3. Type in your username: whatever.whatever.com
4. Use the password you created.
5. Now, click Test.
If you fail the test, make sure you check your spelling or make sure you filled out everything properly. Save everything, and you’re done with the hard part.
Upload your site
1. Under your Files panel on the left, there is an icon that looks like a plug and connector. Click on it. This will connect to the remote server.

2. After you click on it, the plug and connector icon look connected (it looks like the plug is now connected to a socket) and there is a yellow check mark.

3. Now, select your site folder, or you can select the files you want to upload.
4. Once you have your site folder or site files selected, click on the up arrow next to that plug-like icon. This puts files into your server.
5. You’ll get a message asking if you are sure you want to put your entire site into the server, and you click yes.
6. Depending on your site, you might have to wait a while before everything is uploaded.

Check Your Site
The last step is to check your site. Make sure everything is uploaded. I hope this post was very helpful. Let me know in the comments below if you were able to succeed in uploading your site.


-Paigon | Natasha Lane Design Co.